How to make your own charcoal - bushcraft

Charcoal – a very brief history, how to make it and its usesCharcoal – a very brief history, how to make it and its uses

How to make your own charcoal - bushcraft
Charcoal, we all know what it is, right? 

It comes in big (often red) bags of perfectly evenly formed briquettes from the garden centre or the petrol station, in the summer ideal for your BBQ. But what is it actually, when it’s not mass produced, shaped and treated to be easy to light?

What is charcoal?

Charcoal is partially burnt wood. It has undergone pyrolysis – it has been heated to a high temperature in an oxygen depleted atmosphere. It therefore hasn’t yet burnt or combusted but most of the volatile chemicals and the water have been released, through pyrolysis. Once lit, it will burn without a flame, evenly and consistently, with very little smoke. In the more modern charcoal burners the volatile gases realised are recirculated and burnt to continue the “burn” to make the charcoal. If you make your own charcoal, following the instructions below, you will see these gases released as a flammable smoke.

Evidence of charcoal making goes back to almost the start of human history. Charcoal making and burning has been a staple of the British countryside for thousands of years, being a requirement for the start of the Bronze Age, as its high heat allowed the smelting of copper and tin. Charcoal was used to extract all our iron from the start of the Iron Age around 800BCE to the 1700’s when coke was introduced.

So what can I use charcoal for?

BBQs and any fire that wants a long hot burn without much flame, as we’ve seen these high temperatures were needed for smelting metals.

Drawing: Charcoal pencils are a highly sought after item in craft shops, coming in a whole range of different widths they can create wonderful art works. On our family overnight adventure we make charcoal pencils and set them into wood, just like a real pencil. Its first recorded use as a pigment is in caves around 30,000 years ago, in France, Spain and Indonesia.

Ink: Charcoal ground up and suspended in oil is a very simple and basic form of ink that has been used for over 5,000 years. Otzi, the Ice Man, found in a glacier in the Italian Alps, dated to 3,250 BCE had 61 charcoal ink tattoos on his body. The earliest forms of writing are recorded in charcoal ink, as long as its not rubbed off the surface it won’t fade, discolour or react, it is totally inert. It’s also the ink commonly found in track traps, as it’s non toxic and made from natural materials.

Gun Powder: Ground finely and mixed with saltpeter, charcoal can make gun powder.

Water filters: Charcoal is often used in water filters as it has the ability to bind substances to its surfaces known as adsorption. This use was first recorded in 400BCE by the Phoenicians. Activated charcoal was developed to assist in the whitening of sugar, this process increases its adsorption properties.

Soil Improvers: Charcoal is added to soil to increase its carbon content.

Making your own Charcoal

This process is to make a small quantity of charcoal – enough to fill your metal tin. The process can be scaled up, however commercial charcoal burners do operate marginally differently including the more modern ones which recirculate and burn the volatile gases released making it much more efficient.

Making your own Charcoal

This process is assuming you’re making a small quantity of charcoal – enough to fill your metal tin. The process can be scaled up, however commercial charcoal burners do operate marginally differently including the more modern ones which recirculate and burn the volatile gases released making it much more efficient.
Prep Time15 minutes
Active Time45 minutes
Cost: £0

Equipment

  • A source of heat – Fire or Camping gas stove (don’t do this inside it makes lots of smoke).
  • A hammer and nail – to put a hole in the lid of your tin & take the lid off.
  • A clean golden syrup tin or metal paint tin. Old metal Quality Street/biscuit tins work too. It needs to be metal, clean and have a tight fitting lid. 
  • A sharp knife – to trim a stick to fit in the hole.
  • Oven gloves or tongs.
  • Recommended: First aid kit. Method to extinguish fire. 

Materials

  • Dry Sticks Hazel or Willow are great (especially if you’re creating charcoal to draw with) but any will do. Enough to fill your metal tin.

Optional

  • Sawdust Will keep your sticks straighter.

Instructions

  • Using the nail and hammer, pierce a hole in the top of your metal container.
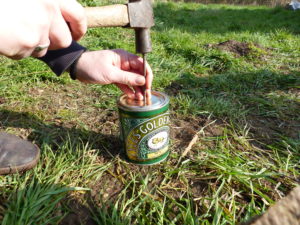
    Hammering a nail in the lid - Charcoal Making - Pippin & Gile Bushcraft Courses and Foraging Courses
  • Trim a short length of stick down, using the knife, so that it will plug the hole.
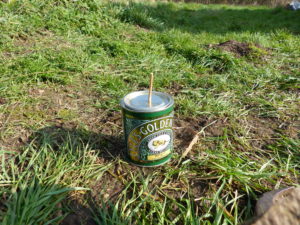
    Securing a bung - Charcoal Making - Pippin & Gile Bushcraft Courses and Foraging Courses
  • Cut lengths of your dry sticks to fit inside your tin.
    Cutting the material to size - Charcoal Making - Pippin & Gile Bushcraft Courses and Foraging Courses
  • If you want to keep your sticks straight – i.e. you’re using them for drawing, pack sawdust around them so they have limited movement.
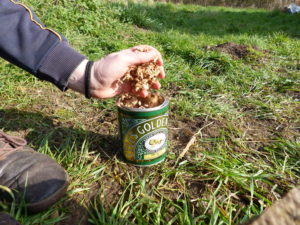
    Filling with sawdust - Charcoal Making - Pippin & Gile Bushcraft Courses and Foraging Courses
  • Place the lid securely on the tin. Taking out the bung and keeping it somewhere to hand.
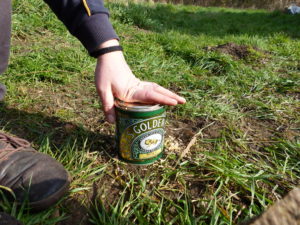
    Pushing down the lid for a tight fit - Charcoal Making - Pippin & Gile Bushcraft Courses and Foraging Courses
  • Place the tin over your heat source – making sure it is stable. 
  • Watch as you see smoke coming out the hole – you can set alight to this if you choose.
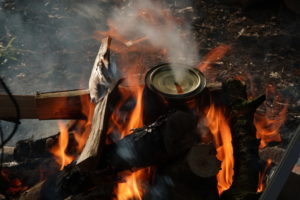
    Starting to smoke - Charcoal Making - Pippin & Gile Bushcraft Courses and Foraging Courses
  • When the smoke stops - remove from the heat using tongs or oven gloves
  • Bung the hole up – ensuring that the cool oxygen rich air outside the container isn’t pulled inside.
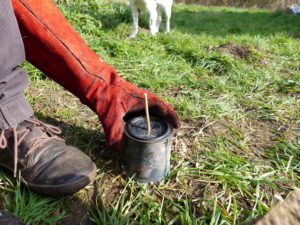
    Charcoal Making - Taking it off the Heat - Pippin & Gile Bushcraft Courses and Foraging Courses
  • Leave until throughly cool – else it can self combust into a glowing ember when you open the tin.
  • Open the tin and see what you’ve created. 
    Open the tin and see your charcoal - Charcoal Making - Pippin & Gile Bushcraft Courses and Foraging Courses
  • Don’t be disheartened if you haven’t got a fully even burn all the way though – its very unlikely you will have done. Any sticks that aren’t fully charred can be finished off by being added back in next time you do a char.
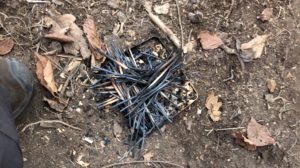
    Open the tin and see your charcoal - Charcoal Making - Pippin & Gile Bushcraft Courses and Foraging Courses
  • Store in an air tight container – charred material is highly absorbent of any moisture in the air.